
How to Replace a Toilet Wax Ring
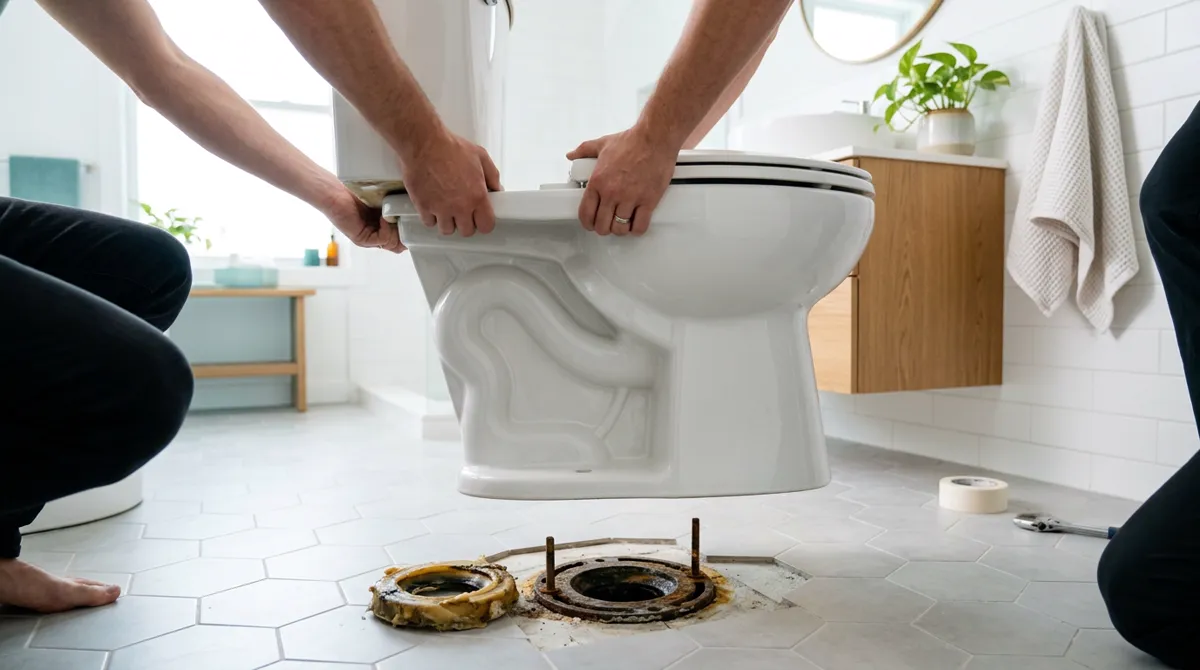
To replace a toilet wax ring, shut off the water, flush and sponge the toilet dry, disconnect the supply line, take the nuts off the closet bolts and lift the toilet straight off the floor. Scrape all the old wax off the flange and the toilet's outlet horn, check the flange for cracks and height, and fit new closet bolts. Press the new ring onto the horn, lower the toilet straight down over the bolts, set it with your body weight, and tighten the nuts a little at a time on alternating sides. Then reconnect the water and flush several times while you watch the base.
Oatey rates a toilet wax ring replacement an intermediate DIY repair, and it is a well-documented one. Oatey, Fluidmaster, Korky and Kohler all publish the steps, and they agree on nearly all of them. Where they differ, mainly on whether the new ring goes on the toilet or on the flange, this guide says so and tells you whose instructions win. The rule that matters most is that a wax ring seals once: Oatey says it can't be reused once compressed, so the toilet has to go down straight the first time.
Be honest about two things before you start. The first is the lift. A toilet is heavy and awkward, Kohler warns that vitreous china can break or chip if it is handled carelessly, and Oatey suggests getting help. The second is the floor. A new ring only seals on a sound flange, so if the flange is cracked or corroded, or the subfloor around it is soft from an old leak, that repair comes first, and that is the point where calling a plumber stops being a luxury. A flange that sits below a newer floor is a smaller problem: it needs a spacer or an extra-thick ring, both covered below.
Buying the seal? Compare wax and wax-free rings by flange height.
See our picks →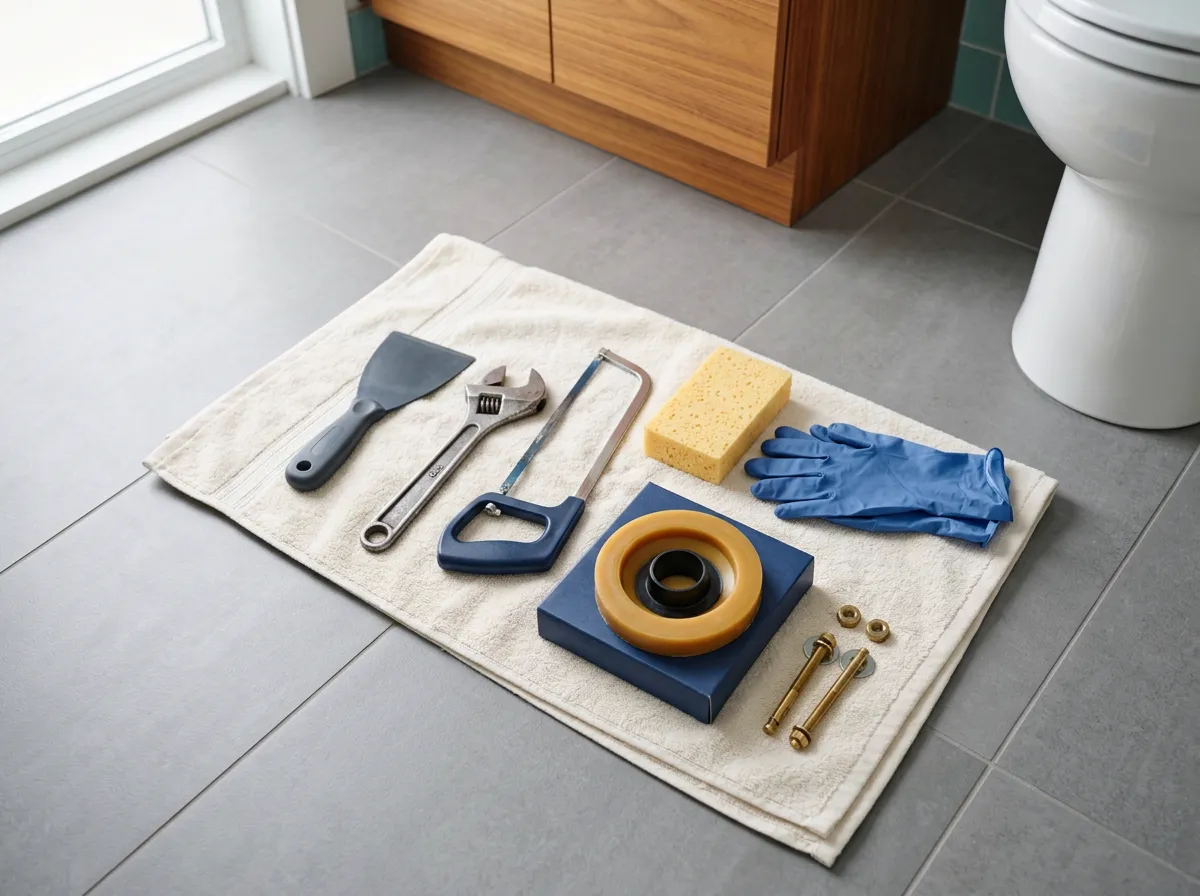
What you'll need
- Adjustable wrench (closet-bolt nuts and the supply-line nut)
- Plastic putty knife, plus rags or paper towels for the old wax
- Sponge and bucket, or water-absorbing crystals, for the last of the water
- Utility knife, if there is caulk around the base
- Small hacksaw to trim the new closet bolts
- Disposable gloves and a padded blanket or cardboard to set the toilet on
- New wax ring or wax-free seal, new closet bolts with washers and nuts, and a new supply line
- A helper for the lift, and toilet shims if the floor is uneven
Signs the wax ring is the problem
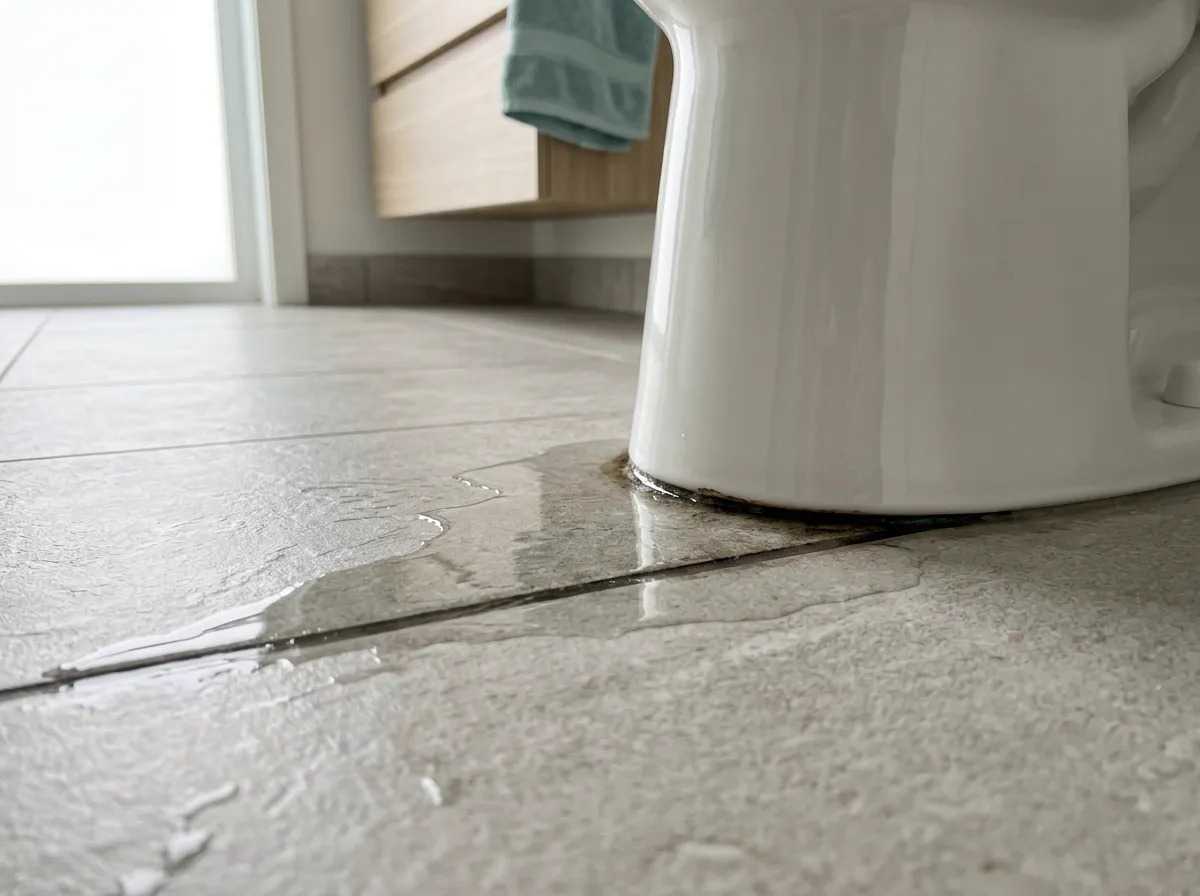
Oatey lists three classic signs of a failed wax ring: water pooling around the base of the toilet, a toilet that wobbles or shifts, and a sewer smell near the toilet that won't go away. Oatey also mentions water stains on the ceiling below the bathroom. None of these proves it on its own, and Oatey's advice is to identify the root cause of a leak before you buy materials. Its own troubleshooting list points at the supply line as well as the flange and bolts, so rule out the cheaper fixes that don't involve lifting anything with our guide to finding where a toilet is leaking. A rocking toilet deserves a closer look too. Oatey notes that if one side of the base lifts off the floor, even slightly, the flange underneath is likely cracked or broken, and a new ring alone won't fix that. If you're not sure what sits where, the toilet parts diagram shows the wax ring, flange and closet bolts under the bowl.
What to buy before you lift the toilet
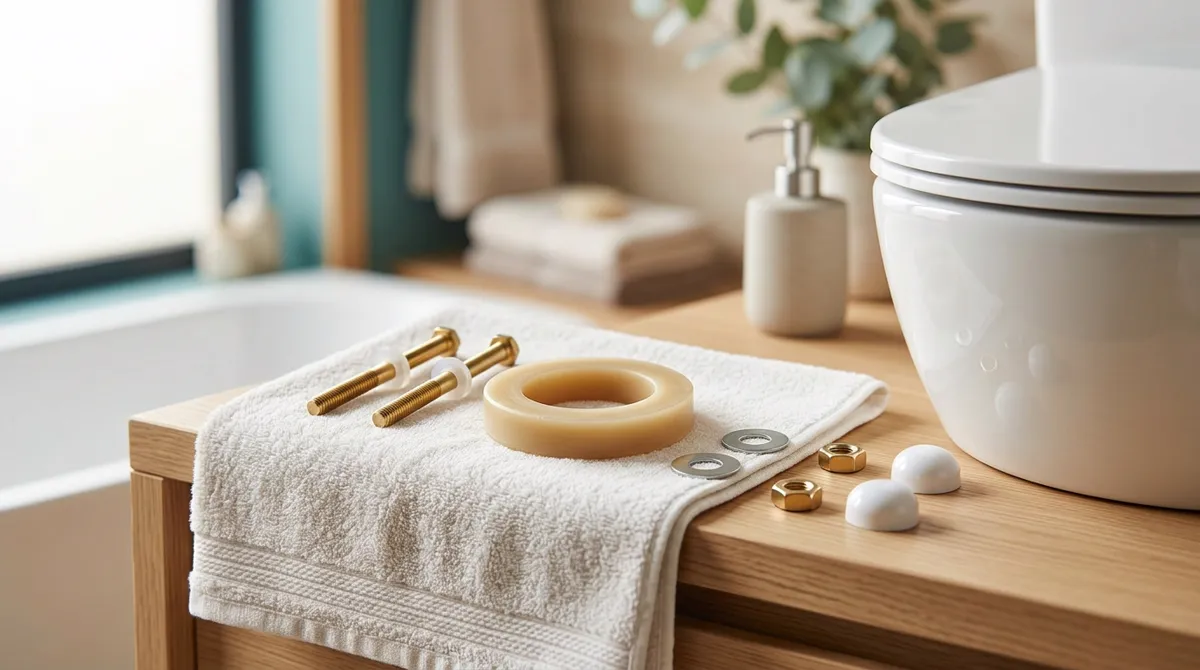
Buy the parts first, because the toilet is out of action until the job is done. You need three things. The first is the seal: a traditional wax ring or a wax-free rubber-and-foam seal. Wax is cheap and conforms to rough surfaces, but it is single-use, and Oatey notes it can get misaligned or damaged if the toilet isn't set correctly the first time. Wax-free seals cost more and can be repositioned (Fluidmaster's instructions for its Better Than Wax seal say so, unlike a traditional wax ring), though Oatey cautions they may not perform as well on uneven or damaged flanges. Oatey's standard rings fit both 3-inch and 4-inch waste lines. Thickness depends on where your flange sits against the finished floor, and Oatey warns that thicker new flooring, such as tile laid over vinyl, can leave the flange below it. The second is a set of new closet bolts: Oatey says to replace them whenever you replace the wax ring, and many ring kits include them. The third is a new supply line, which Oatey lists among the materials. Our best toilet wax rings guide compares the options by flange height and what comes in the box.
How to remove a toilet
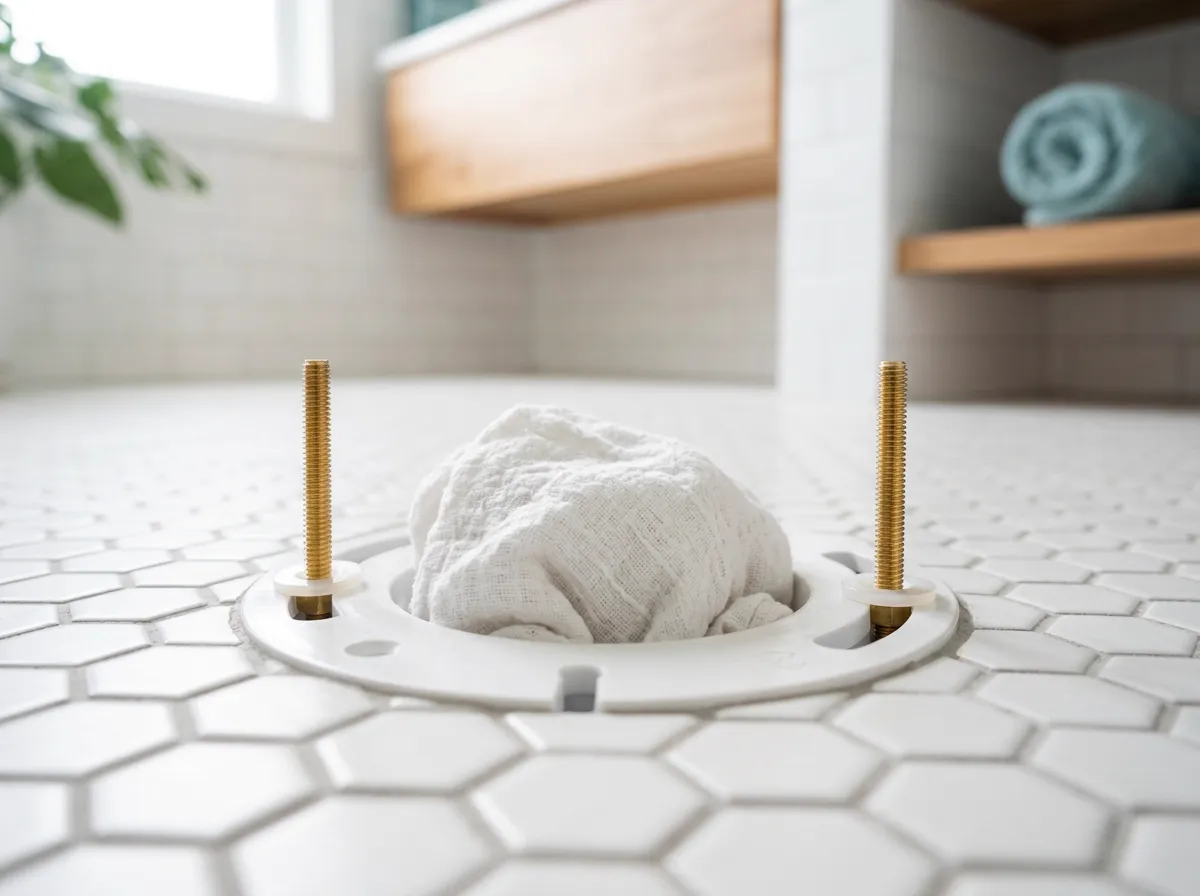
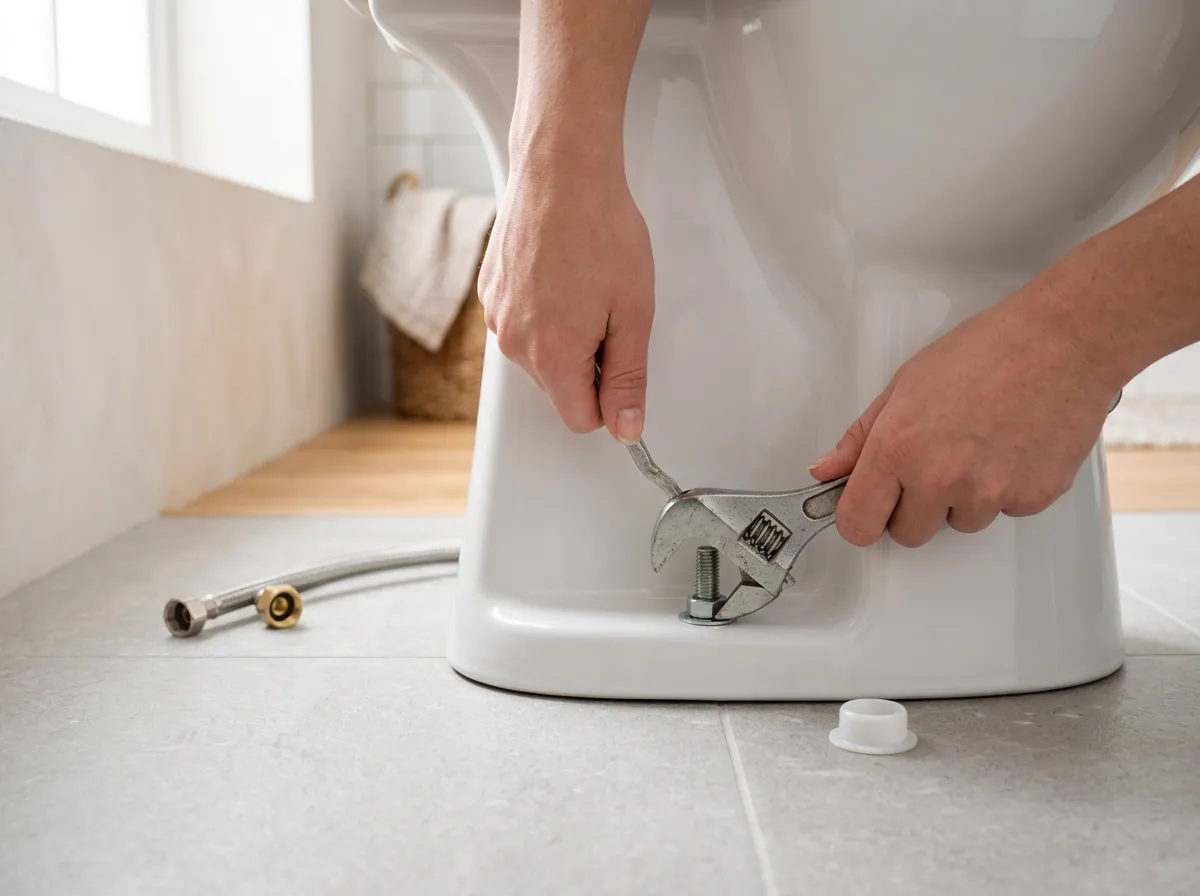
Turn the shut-off valve behind the toilet clockwise until it stops. Flush, and hold the handle down so as much water as possible drains from the tank and bowl, which is Oatey's tip. Sponge out what's left, or use water-absorbing crystals, and put a towel under the valve to catch drips. Loosen the nut on the supply line and disconnect it. Pry off the decorative caps at the base and unscrew the nuts from the closet bolts. If there's caulk around the base, score through it with a utility knife. Then rock the toilet gently side to side to break the old wax seal and lift it straight up. Get help if you can, and set it down on a padded blanket or cardboard rather than bare tile, because the china chips. With the toilet off, the drain is open to the sewer. Kohler's instructions say to put a rag in the flange if the toilet isn't going straight back on, to keep sewer gas out, and Oatey suggests the same. Just remember it's there: the rag has to come out before the toilet goes back down.
Scrape off the old wax and inspect the flange
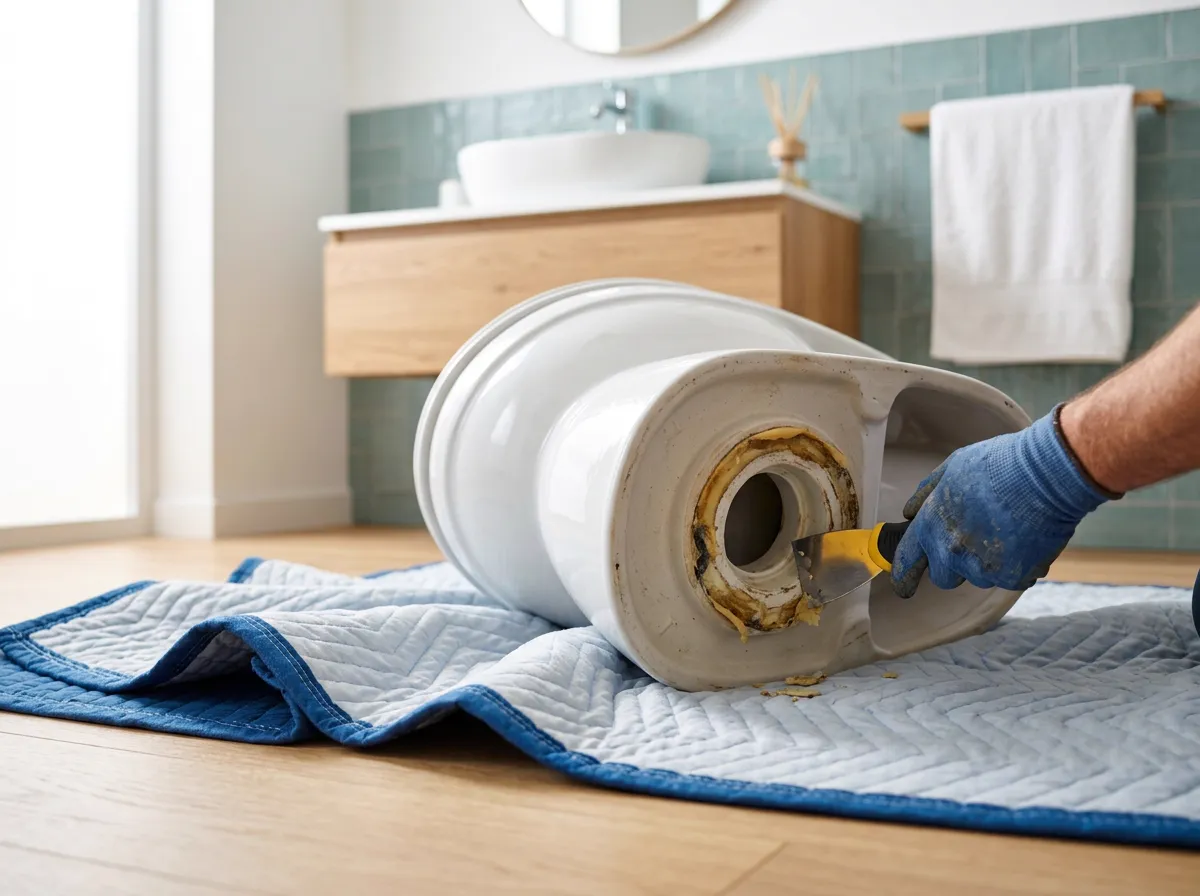
Scrape the old wax off both surfaces, the flange in the floor and the outlet horn on the bottom of the toilet, with a plastic putty knife, then wipe away the residue with a damp cloth. Fluidmaster's instructions for its wax-free seal say no wax residue should remain, and that is worth aiming for whichever seal you use. Pull out the old closet bolts too. Then look hard at the flange, because the new ring depends on it. The checklist in Oatey's flange guide covers cracks or breaks in the ring, rust or corrosion (especially on metal flanges), signs of water damage or earlier leaks, and height, and Oatey's re-attach guide adds a flange missing one or both of its bolt slots. Oatey says the flange should sit flush with or slightly above the finished floor. Measure where yours sits with a ruler, as the Korky and Fluidmaster seal instructions tell you to, and shine a flashlight down the pipe. If the subfloor around the flange is soft or stained, Oatey warns that a compromised subfloor can weaken the fasteners holding the flange, and says to assess whether that section needs cutting out and replacing before the toilet goes back.
Broken, low or below-floor flange: fix it first
Korky's instruction sheet puts it plainly: a cracked or damaged flange must be repaired before you install the seal. Oatey splits the fixes three ways. Minor damage can take a repair ring screwed to the subfloor over the old flange, and Oatey's re-attach guide uses one for a cracked flange or a missing bolt slot. A flange sitting below the finished floor, which is common after new flooring goes down, can be raised with flange spacers or matched with an extra-thick wax ring. A flange that is badly damaged or corroded should be replaced entirely. What you should not do is stack two wax rings to make up the height. Oatey says stacking isn't recommended and points to an extra-thick ring or a spacer kit instead. Wax-free seals are different: Korky and Fluidmaster print their own flange-height steps, including when to add a spacer or a second seal, so follow the sheet in your box. This is also the honest point to call a plumber. Replacing a flange means working on the drain pipe itself, and Oatey notes the right part depends on whether that pipe is PVC, ABS or cast iron.
Set the new wax ring and closet bolts
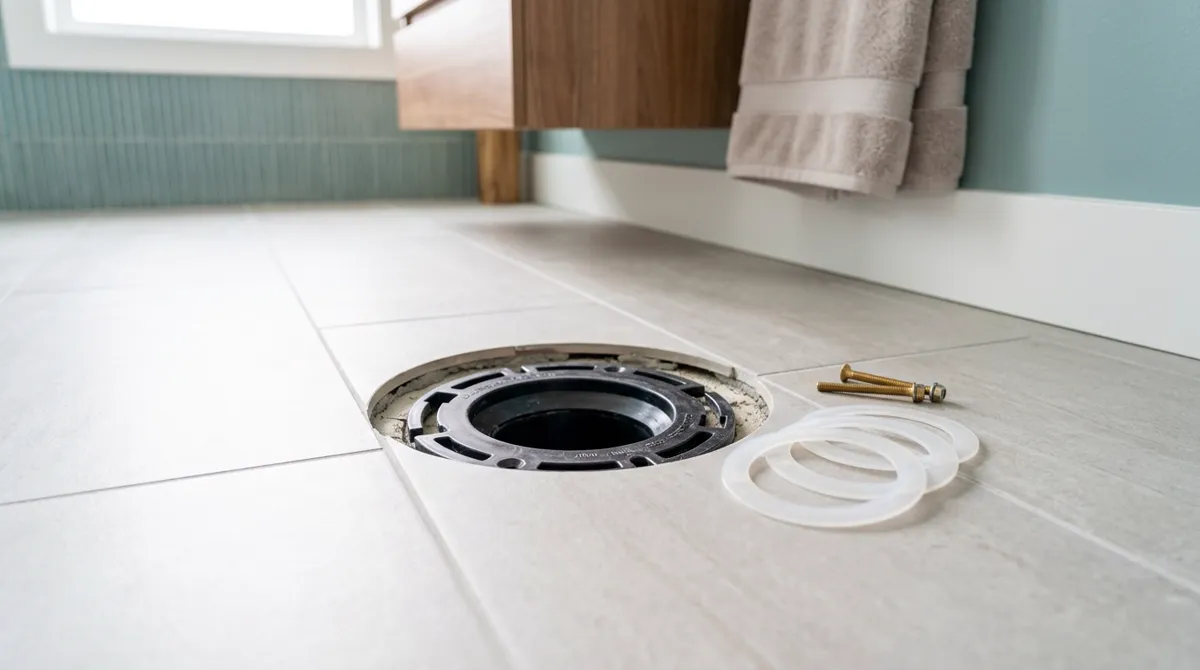
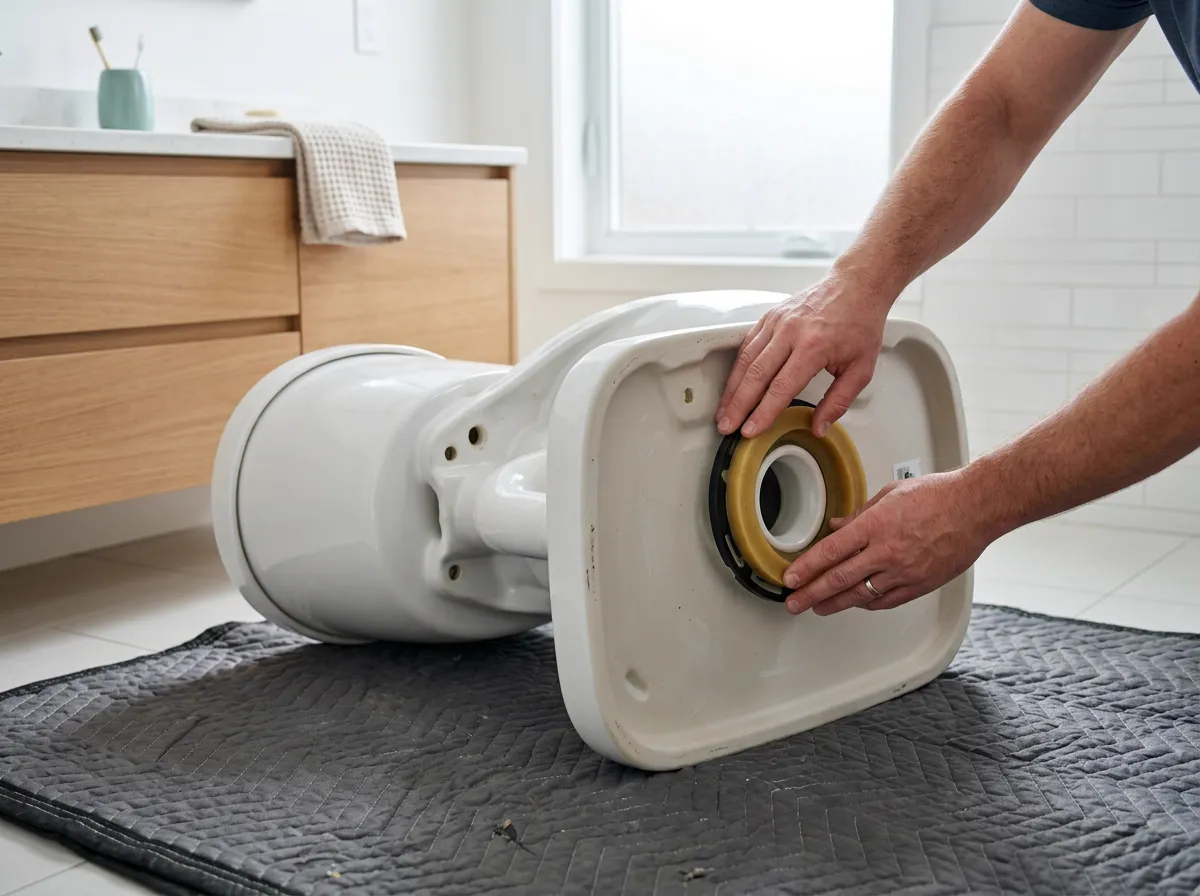
Slide the heads of the new closet bolts into the slots in the flange and push the small plastic washers down to hold them upright; both the Korky and Fluidmaster instructions show this. Before any wax goes on, Oatey recommends a dry fit: set the toilet on the flange without the seal to confirm the bolts line up and to see whether the floor is level or the bowl will need shims. Lift it off, take the rag out of the drain, and fit the ring. This is where the instructions differ. Kohler's guide has you lay the toilet on a padded surface and press the ring firmly onto its outlet horn. Fluidmaster's instructions also press it onto the bowl outlet, and add that a ring with a plastic flange goes on with that plastic piece pointing away from the bowl. Oatey's guides allow centering the ring on the floor flange instead. Wax-free seals from Korky and Fluidmaster go on the flange too, and Fluidmaster's slides down over the bolts through its own bolt holes. If your ring or your new toilet came with instructions, those win. One more detail from Fluidmaster: the instructions for its 7512 reinforced wax ring kit say the wax gasket should be at least 70°F for the wax to flow properly.
How to reset a toilet on the new ring
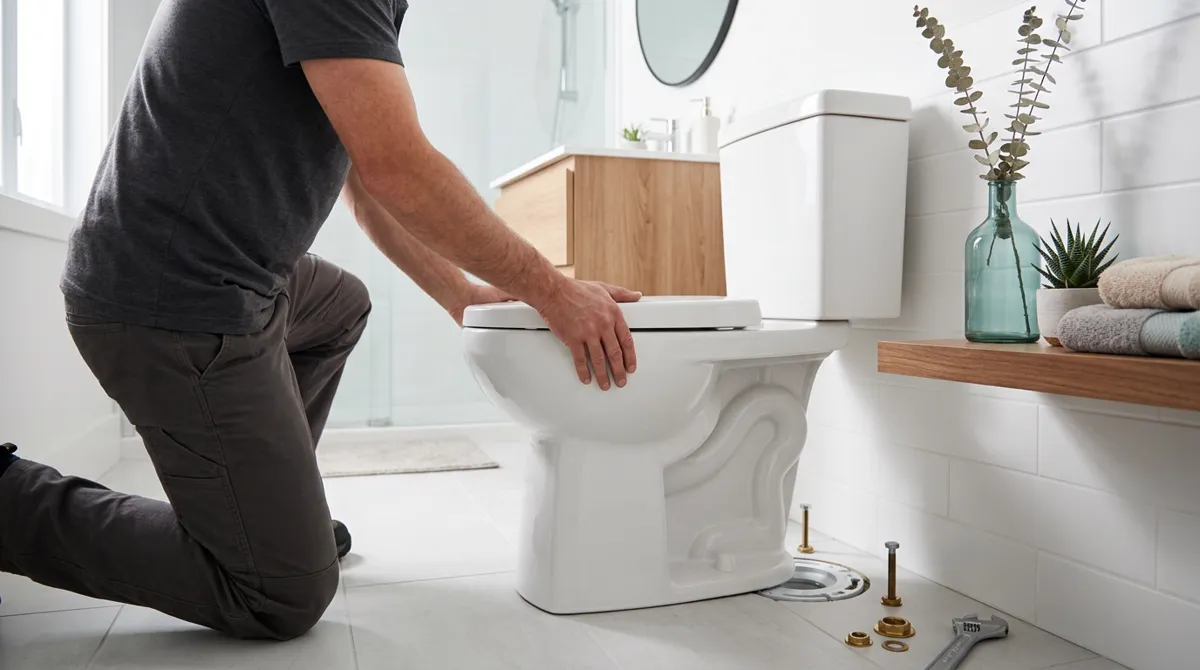
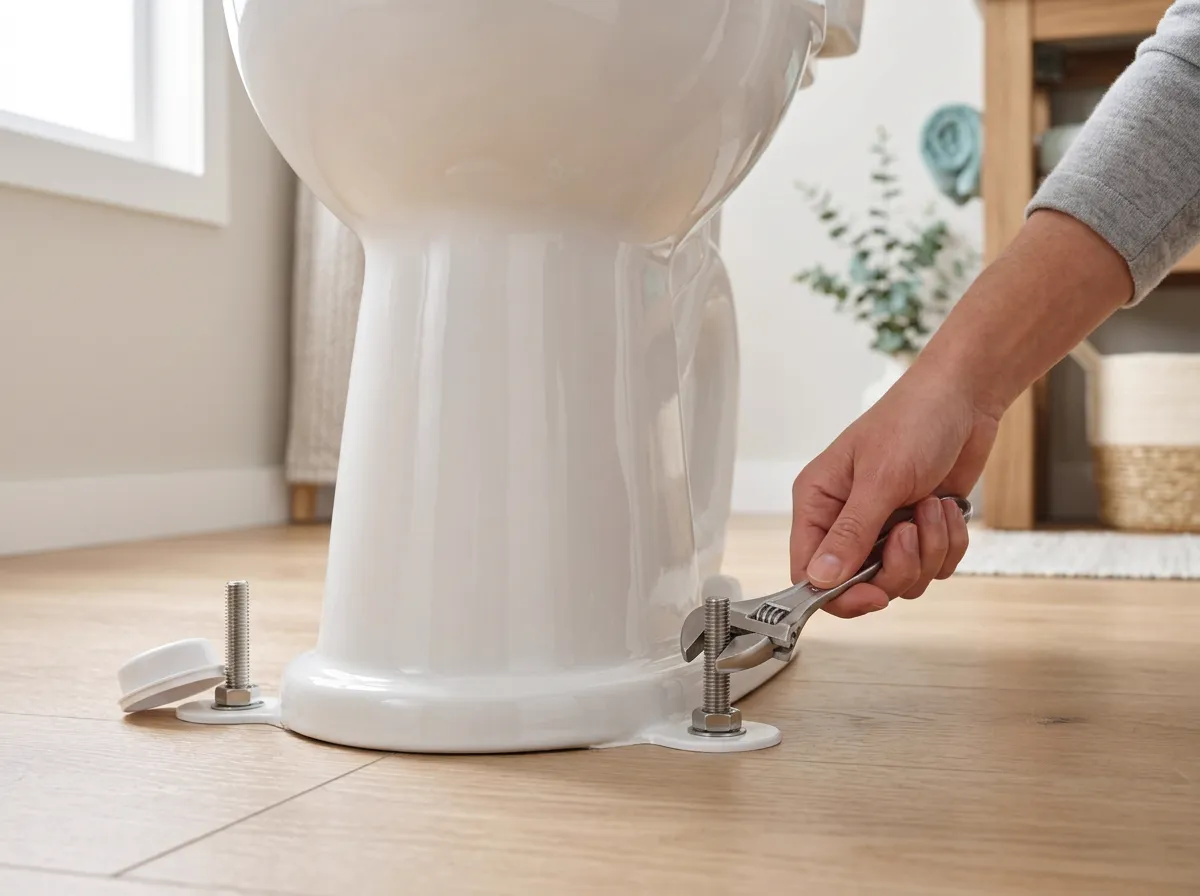
Lower the toilet straight down over the bolts, keeping it as level as you can with the tank parallel to the wall behind it, as Oatey describes. Then press it down: Kohler says to apply your full body weight around the toilet to set the seal. Oatey allows a slight twist but no rocking, and Fluidmaster also twists the bowl slightly to spread the wax. Once the bowl is down, don't lift it or rock it; Kohler's guide says that if you break the watertight seal, you must install a new wax seal. Tighten the washers and nuts gradually, alternating sides, with downward pressure on the bowl, and stop at snug: Korky warns that overtightening can crack the bowl or the flange. If the toilet still rocks, Oatey's answer is shims or a flange-height check, not more force on the nuts. Kohler says to cut the bolts if they stand 1/4 inch or more above the nut, keeping the saw blade off the porcelain, then fit the caps. Hand-tighten the supply-line nut onto the fill valve, with no tape or sealant; if it drips once the water is on, turn it just enough to stop the leak. Open the valve slowly and flush several times while you check around the base and, if you can reach it, underneath the floor. Oatey's guides finish with caulk around the base once there are no leaks. Korky doesn't recommend caulking around the base, because caulk can hide a leak; if you do caulk, leave the back open so water has a way out and a future leak shows on the floor. Our toilet leaking guide covers the caulk question.
How to install a new toilet instead
If you're replacing the toilet rather than resealing it, the floor work is the same: remove the old one, clean and inspect the flange, then fit new bolts and a new seal. A few steps come first or get added. Measure the rough-in, the distance from the finished wall to the center of the drain, before you buy, because Kohler's guide says the supply and outlet have to conform to the new toilet's roughing-in dimensions; our rough-in calculator walks through the measurement. Kohler also says to inspect the new toilet for damage before you start, and to install a supply shut-off valve if the old toilet didn't have one. A two-piece toilet needs its tank mounted once the bowl is set. Kohler centers the tank gasket on the bowl inlet, tightens the tank-bolt nuts until snug, checks that the tank is level side to side and front to back, and warns that overtightening the tank bolts can break or chip the china. Once the water is on, set the level at the tank's waterline mark, or about 1/2 inch below the top of the overflow tube if there isn't one; our guide to adjusting a toilet float covers how. The new toilet's own installation sheet overrides anything here, including the seal and bolts it calls for.
Tips & warnings
- Dry-fit the toilet on the flange before the seal goes on. It shows you whether the bolts line up and whether the floor needs shims, and both Oatey and Korky recommend it. Then take the rag out of the drain.
- Never stack two wax rings to make up for a low flange. Oatey's fix is an extra-thick ring or a flange spacer.
- Bring the closet-bolt nuts down a little at a time on alternating sides and stop at snug, because too much force can crack the bowl or the flange.
- Buy a spare wax ring with the first one, especially if the store is far away. If the toilet goes down crooked and has to come back up, the flattened ring can't be reused.
- While the tank is empty, check the flapper. Oatey calls it an ideal time, and our guide to replacing a toilet flapper covers the swap.
- Keep checking the base after the job. Kohler's installation guide says to check for leaks periodically for several days afterwards.
Frequently asked questions
How do you replace a toilet wax ring?
Shut off the water, flush, and sponge out what's left. Disconnect the supply line, unbolt the toilet, and rock it gently to break the old seal before lifting it straight up. Scrape the flange and the toilet's outlet horn clean, check that the flange is sound, and fit new bolts. Set the new ring on the horn (or center it on the flange), lower the toilet straight down and set it with your body weight. Tighten the nuts evenly until snug, reconnect the water and flush while checking the base. If the flange is cracked or the subfloor is soft, fix that first or call a plumber; a flange below the finished floor needs a spacer or an extra-thick ring.
Does the wax ring go on the toilet or on the flange?
Either, depending on whose instructions you follow. Kohler and Fluidmaster put a wax ring on the toilet, pressed onto the outlet horn underneath. Oatey accepts the horn or the floor flange. Korky's and Fluidmaster's wax-free seals sit on the flange. If your ring or your toilet came with its own instructions, follow those.
Do I need new closet bolts when I replace the wax ring?
Yes. Oatey says to replace the toilet mounting bolts whenever you replace the wax ring, and Kohler's installation guide also calls for new T-bolts. Many wax ring kits include new bolts, which saves a second trip. The new bolts slide into the slots in the flange, and small plastic washers pushed down to their base hold them upright while you lower the toilet. After the nuts are tightened, trim any bolt that stands too tall for its cap.
What if I set the toilet down crooked on the new wax ring?
With wax, you start again. Kohler's guide says not to lift or rock the bowl after placement, and that if you break the watertight seal you must install a new wax seal. So if the bolts didn't come through the holes or the tank ended up badly out of square, lift the toilet, scrape the flattened wax off both surfaces, and set a fresh ring. A slight twist while you press the bowl down is fine (Oatey and Fluidmaster both allow it); lifting and re-setting is not. The best prevention is a dry fit before the ring goes on, so you know where the bolts land. Wax-free seals are more forgiving here, since Fluidmaster's instructions say its seal lets you reposition the toilet during installation.
How tight should toilet closet bolts be?
Snug, not tight. None of the manufacturer instructions we checked give a torque figure. What they say is to tighten carefully, a little at a time on alternating sides, with downward pressure on the bowl, until the toilet sits firmly on the floor. Korky warns that overtightening can crack the bowl or the flange, and Kohler warns it can break or chip the vitreous china. If the toilet still rocks once the nuts are snug, cranking harder is the wrong fix. Oatey's advice is to shim the base or check the flange height instead.
Why is my toilet still leaking after I replaced the wax ring?
Oatey's troubleshooting list is short: check that the flange is level and at the right height, check that the bolts are secure, and consider replacing the water supply line. Before lifting the toilet again, confirm where the water is actually coming from; our toilet leaking guide covers how to trace it. If water is reaching the ceiling below or soaking into the subfloor and you can't see any damage to the flange or pipe, Oatey suggests having a professional check the piping under the floor.
Sources
- Oatey — How to Replace a Toilet Wax Ring to Fix Toilet Leaks
- Oatey — How to Replace, Repair & Re-attach Your Toilet (project guide)
- Oatey — How to Repair or Replace a Toilet Flange (project guide)
- Oatey FAQ — How is a wax seal installed?
- Oatey 101 — What Is a Toilet Wax Ring and When Should You Replace It?
- Oatey — Wax vs. Non-Wax Toilet Seals: Which Should You Choose?
- Fluidmaster — How to use wax when installing a toilet bowl
- Fluidmaster — 7512 Reinforced Wax Ring Kit installation instructions (PDF)
- Fluidmaster — 7530 Better Than Wax toilet seal kit instructions (PDF)
- Korky — 6000BP WaxFREE Seal Kit instructions (PDF)
- Kohler — Installation Guide, Close-Coupled Toilets (1004604, PDF)
- Fluidmaster — 400A Fill Valve Installation Instructions (PDF)
- Korky — How to Replace a Toilet Fill Valve
- Korky — How to Install a Toilet (caulking guidance)