How to Replace a Toilet Fill Valve
To replace a toilet fill valve, shut off the water supply and flush to drain the tank, then sponge it dry. Disconnect the supply line, unscrew the locknut under the tank, and lift out the old valve. Set the new valve's height, secure it, reconnect the supply, and adjust the water level to about 1/2 inch below the overflow tube.
A worn fill valve is the most common cause of a running toilet, a phantom-flushing tank, or a hissing sound that never stops. The good news: it is one of the easiest plumbing fixes you can do yourself. A universal replacement valve costs around $10 to $20, takes most people 20 to 30 minutes, and needs only a few basic tools. This guide walks you through every step, from killing the water to a final leak check.
See the best toilet fill valves.
See our picks →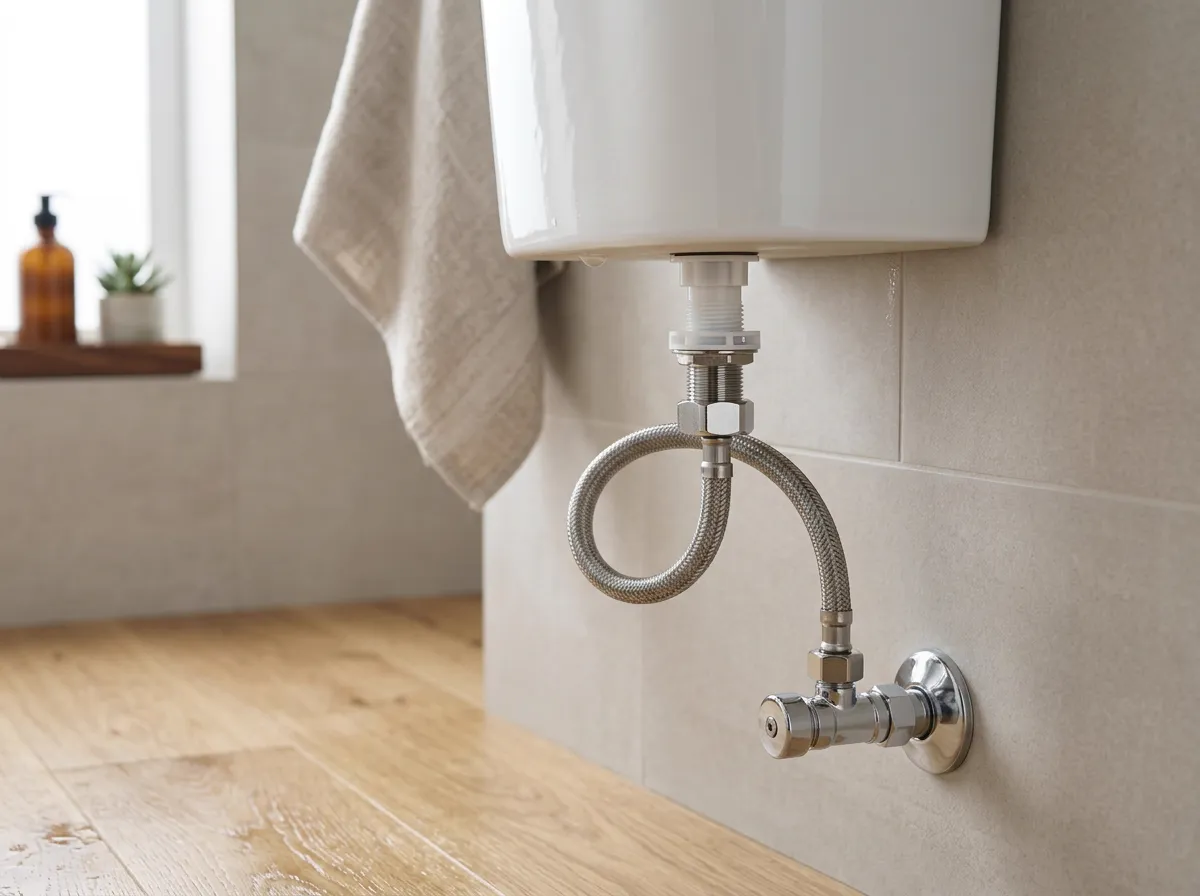
What you'll need
- Adjustable wrench or channel-lock pliers (for the locknut and supply line)
- Flathead screwdriver (for float/level adjustment)
- Sponge and small bucket or towels
- New universal toilet fill valve (e.g., Fluidmaster or Korky)
- Replacement water supply line (optional, but smart to swap while you're in there)
Step by step
- Shut off the water supply. Find the shut-off valve on the wall or floor behind the toilet and turn it clockwise (righty-tighty) until it stops. If there's no shut-off valve, or it's stuck, turn off your home's main water supply instead. This stops fresh water from refilling the tank while you work.
- Drain the tank. Take the tank lid off and set it somewhere safe (it's heavy and cracks easily). Flush the toilet and hold the handle down to drain as much water as possible. Use a sponge and bucket to soak up the last inch or so of water sitting at the bottom of the tank so it's nearly dry.
- Disconnect the water supply line. Place a towel or shallow bucket under the tank to catch drips. Using an adjustable wrench, unscrew the supply line coupling from the bottom of the old fill valve where it pokes through the tank. A little water will run out, that's normal. Set the supply line aside.
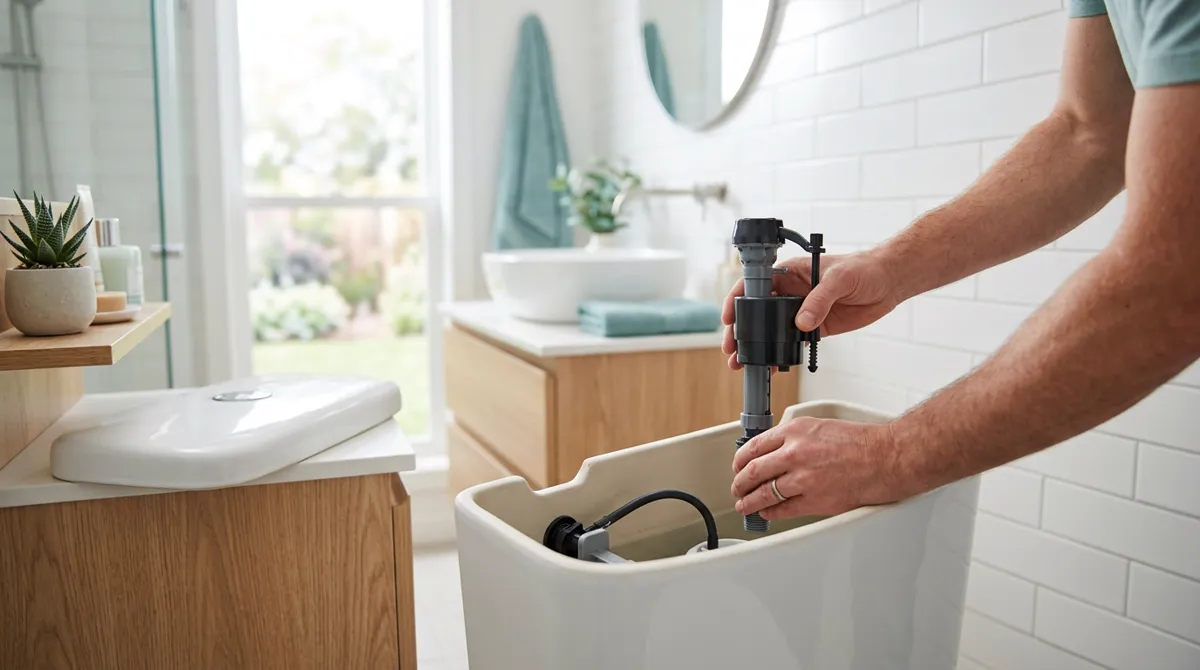
- Remove the old fill valve. From outside the tank, use your wrench or pliers to unscrew the plastic locknut that holds the fill valve in place. Once it's off, reach inside the tank and pull the old fill valve straight up and out. Wipe the area around the hole clean so the new valve seats well.
- Set the height and install the new valve. Adjust the new valve's height first: twist or slide the telescoping body so the critical-level (CL) mark sits at least 1 inch above the top of the overflow tube (the open vertical pipe in the center). Drop the valve into the hole, keep it vertical, and hand-tighten the locknut underneath. Snug it about a half-turn past hand-tight with your wrench, do not overtighten the plastic.
- Reconnect the supply line. Thread the water supply line back onto the bottom of the new fill valve. Hand-tighten only, then give it a gentle quarter-turn with the wrench. Do not use Teflon tape or sealant here, the rubber washer inside makes the seal on its own and tape can cause leaks. Clip the small refill tube onto or into the overflow tube as the instructions show.
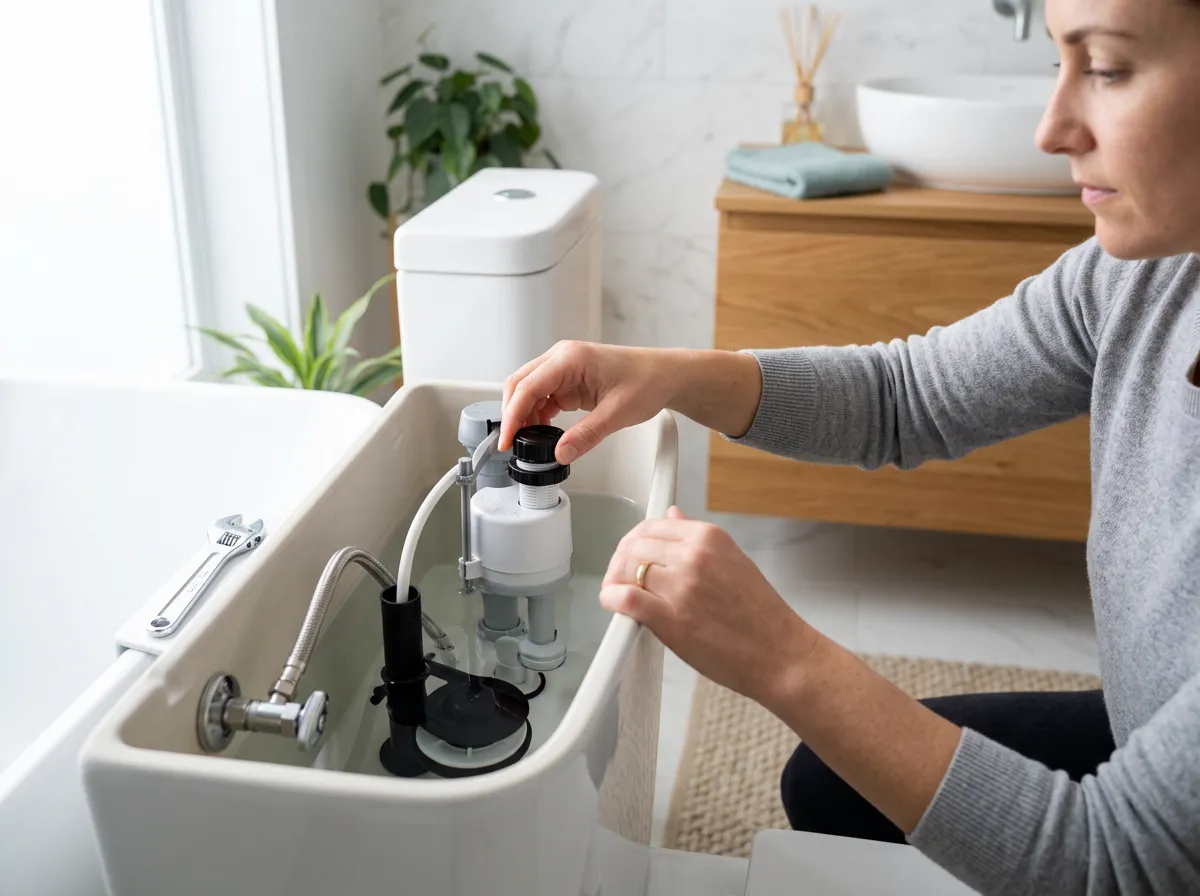
- Turn the water back on and set the level. Slowly turn the shut-off valve counterclockwise to let the tank refill. The tank should stop filling on its own. Adjust the float so the water settles about 1/2 inch below the top of the overflow tube, usually by turning the adjustment screw on top of the valve with a flathead screwdriver (clockwise raises the level, counterclockwise lowers it).
- Test for leaks. Flush the toilet two or three times and watch the tank refill and shut off cleanly each time. Check for drips at the locknut under the tank and at the supply line connection. Run a dry hand or paper towel along both joints, if it comes away wet, snug the connection slightly. Once everything is dry and the toilet stops running, put the lid back on.
Tips & warnings
- Set the water level using the overflow tube, not the tank wall: aim for about 1/2 inch below the top of the overflow tube for a strong flush without overflowing.
- Buy a universal fill valve. Brands like Fluidmaster and Korky fit nearly every standard toilet, so you don't need to match your exact model.
- Never use Teflon tape or pipe dope on the fill valve's supply connection, the built-in rubber washer seals it, and tape often makes it leak instead.
- Replace the flexible supply line at the same time if it's old or kinked, it's cheap insurance against a future drip or burst.
- If the new valve hisses or keeps running, double-check that the critical-level mark sits above the overflow tube and that the float isn't snagging on anything inside the tank.
Frequently asked questions
How long does it take to replace a toilet fill valve?
Most people finish in 20 to 30 minutes. If your shut-off valve is stuck or you also swap the supply line, give yourself closer to 45 minutes. The actual valve swap is quick, draining and drying the tank is what takes the most time.
Do I need to replace the whole toilet, or just the fill valve?
Just the fill valve. A running or hissing toilet is almost always a worn fill valve or flapper, not a bad toilet. A new fill valve costs $10 to $20, while a new toilet runs hundreds, so replacing the part first almost always solves the problem.
Why is my toilet still running after I replaced the fill valve?
Usually the water level is set too high, so water spills into the overflow tube nonstop. Lower the float until the water sits about 1/2 inch below the overflow tube. If it still runs, the flapper at the bottom of the tank is likely worn and leaking, replace that too.
Can I replace a fill valve without turning off the main water?
Yes, if your toilet has its own shut-off valve on the wall or floor behind it, just turn that one. Only shut off the home's main water if there's no local valve or it won't fully close. Always drain and sponge the tank dry before you start either way.