How to install a bidet seat
Installing an electric bidet seat is a straightforward DIY project that most homeowners can complete in 30 to 60 minutes with basic hand tools. Unlike a standalone bidet fixture, a bidet seat mounts directly on your existing toilet, uses your toilet's water supply line, and plugs into a standard grounded outlet — no new plumbing rough-in required. The trickiest part for most people is not the install itself but confirming two things before the bidet arrives: that your toilet bowl shape (elongated or round) matches the seat you ordered, and that you have a GFCI-protected grounded outlet within roughly four feet of the toilet on the right side wall (cords on most models exit from the right).
This guide covers a standard electric bidet seat — the type with a heated seat, warm-water wash, and air dryer that plugs into the wall. The process involves shutting off and draining the water supply, removing your old seat, attaching the bidet's mounting plate, installing a T-valve (also called a T-adapter or tee fitting) on the fill line, connecting the bidet's supply hose, seating the unit on the plate, and plugging in. Each connection uses hand-tightening plus a quarter-turn — no soldering, no pipe cutting, no permits required for the water side. The electrical side is equally simple as long as a proper outlet already exists; if it does not, hire a licensed electrician to add one before you begin.
Read through all the steps before you start so nothing catches you off guard. Pay particular attention to the notes on skirted toilets, cord routing, and the importance of not overtightening plastic or porcelain fittings — these are the most common sources of post-install headaches.
Shopping for a bidet seat first? See our tested top picks.
See our picks →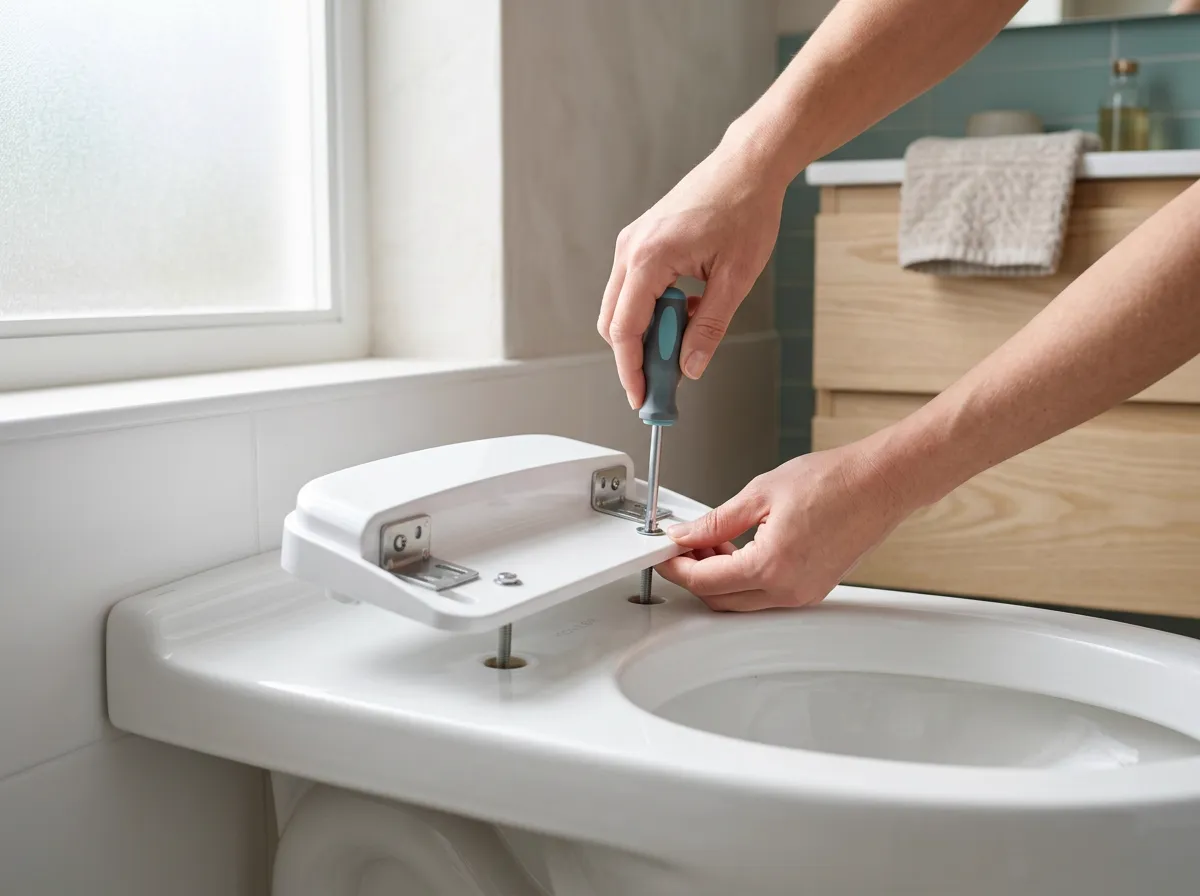
What you'll need
- Adjustable wrench or channel-lock pliers (padded jaws recommended)
- Flathead screwdriver
- Phillips screwdriver
- Bucket or towel (to catch residual water)
- Tape measure
- Plumber's tape (PTFE thread tape) — optional but useful on threaded brass fittings
- Included hardware: T-valve, braided bidet supply hose, mounting plate, seat bolts, nuts
Step by step
- Confirm compatibility and outlet before you begin. Check that your toilet bowl shape — elongated (about 18.5 inches front to back) or round (about 16.5 inches) — matches the seat model you purchased. Measure the distance from the bolt holes at the back of the bowl to the front rim; most seats list a maximum bowl length. Also confirm there is a GFCI-protected, 3-prong grounded outlet on the wall within roughly 4 feet of the toilet, ideally on the right side. If your bathroom outlet lacks GFCI protection or does not exist, stop and have a licensed electrician install one before going further. Do not use a non-grounded adapter or a standard extension cord.
- Turn off the water supply. Locate the shut-off valve on the wall or floor behind and below the toilet tank. Turn it clockwise until it stops. If the valve is stiff or more than 10-15 years old and you are not sure it will fully seat, turn off water at the main instead — an old valve that does not fully close will make the T-valve step messy. Once the valve is closed, flush the toilet to drain the tank and bowl, then press the flush lever again to release any remaining pressure in the fill line.
- Drain and disconnect the supply line. Place a towel or small bucket under the supply line connection at the bottom of the toilet tank. The supply line runs from the shut-off valve on the wall up to a threaded port (the fill-valve shank) on the underside of the tank. Hold the fill-valve shank steady with one hand (or a second wrench) and loosen the nut at the top of the supply line with your wrench — counterclockwise. A little water will spill; the bucket catches it. Once disconnected, set the supply line aside — you will reuse it.
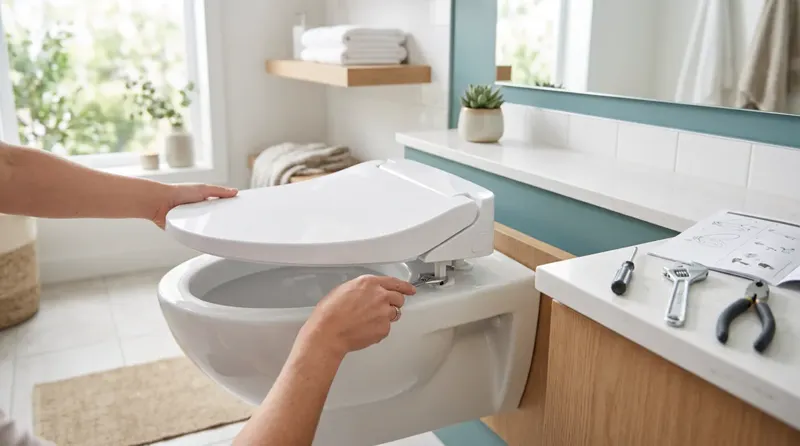
- Remove the old toilet seat. Open the plastic caps at the back of the seat to expose the seat bolts. Use a screwdriver or small wrench to hold the bolt from above while you unscrew the plastic nut underneath the bowl. On some seats the nut is a wing nut you can hand-loosen. Lift the old seat straight off. Clean the area around the bolt holes before the next step — residue or mineral deposits there will prevent the mounting plate from sitting flat.
- Position and attach the bidet mounting plate. Slide the mounting plate (also called the catch plate or bracket) over the toilet bolt holes. The plate needs to sit centered and level, with the bidet's nozzle area oriented toward the back of the bowl. Insert the provided mounting bolts down through the plate and bowl holes, then thread the plastic nuts from underneath and hand-tighten. Snug them with a wrench just until the plate does not shift — avoid overtightening, which can crack the porcelain. Most plates have a front-to-back adjustment slot so you can fine-tune position before locking down.
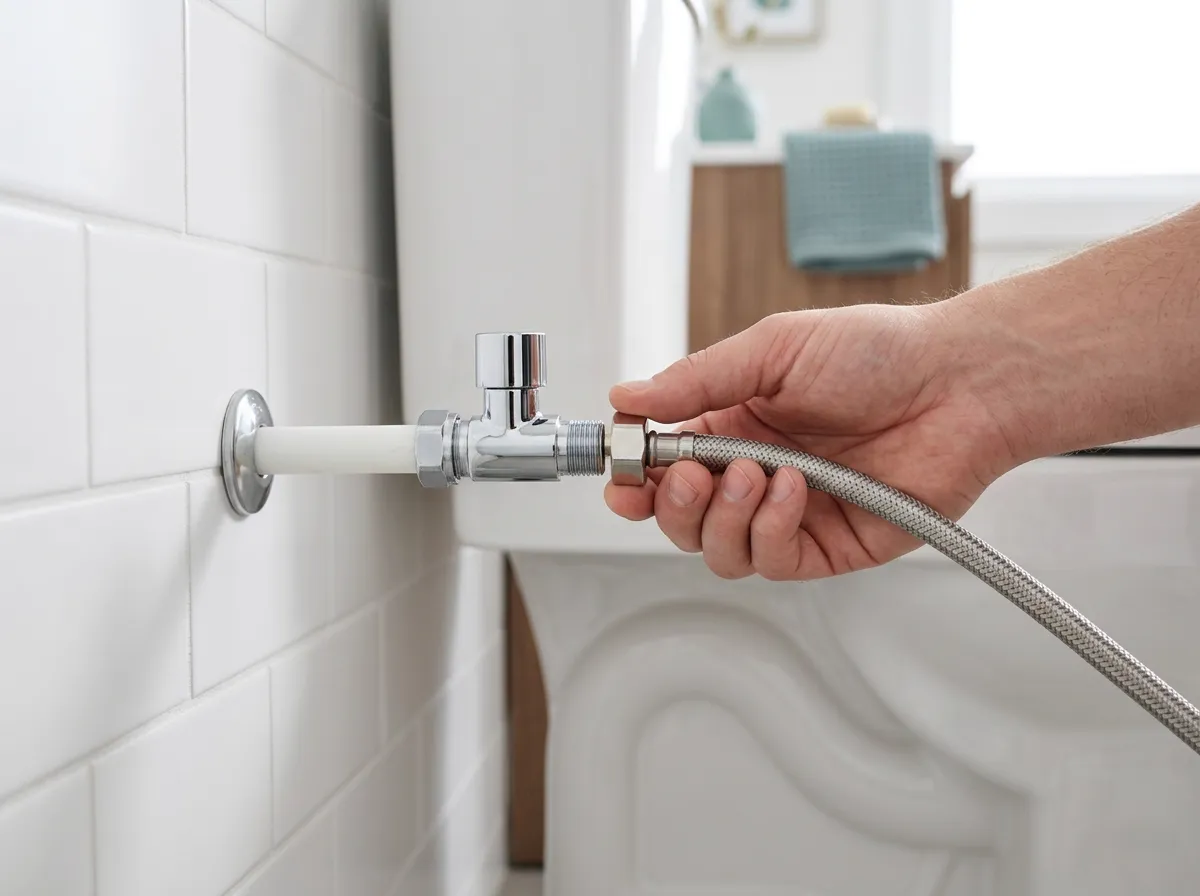
- Install the T-valve on the fill-valve shank. The T-valve threads onto the same fill-valve shank where your supply line was connected. Thread it on by hand, clockwise, until snug, then give it a firm quarter-turn with a wrench. The T-valve has three ports: top (to the tank), side (to the bidet hose), and bottom (to the existing supply line from the wall). Some installers wrap the fill-valve shank threads with two wraps of PTFE tape before threading the T-valve on — this is optional but reduces the chance of a slow drip at that joint. Do not use pipe dope (paste sealant) on plastic threads.
- Reconnect the supply line and attach the bidet hose. Thread your existing supply line back onto the bottom port of the T-valve (hand-tight plus a quarter-turn). Then connect the bidet's braided supply hose to the side port of the T-valve (hand-tight plus a quarter-turn) and run the other end to the water-inlet port on the bidet seat unit itself. All these connections use standard compression or swivel fittings — no tools beyond a snug hand-tighten are needed. Over-torquing plastic swivel fittings is a leading cause of cracked fittings and leaks.
- Seat the bidet unit on the mounting plate. Hold the bidet seat level over the mounting plate and slide it forward until you hear or feel it click into place on the plate's guide tabs. Give it a gentle forward-and-back tug to confirm it is locked. Most seats are designed to release by pressing a button or tab at the back — useful for cleaning. Verify the nozzle area is positioned over the bowl and the unit is not pressing against the tank. You need at least 1.5 to 2 inches of clearance between the back of the seat and the front of the tank.
- Plug into the GFCI outlet. Route the power cord away from the water supply hose and out of any path where water could drip on it. Create a small drip loop — a gentle downward bend in the cord before it reaches the outlet — so that any splash or condensation runs off the cord rather than down into the outlet. Plug the three-prong cord into the GFCI outlet. Do not plug it in until all water connections are made and you are ready to test.
- Turn the water back on and check for leaks. Slowly turn the shut-off valve counterclockwise to restore water flow. Watch all three T-valve connections — top, side, and bottom — as the tank fills. Check the bidet's inlet connection as well. Let the tank fill completely. If you see drips at any connection, turn off the supply, dry the fitting, and snug it by hand plus a firm quarter-turn. Do not keep tightening repeatedly — if a plastic fitting leaks after a quarter-turn past hand-tight, the issue is usually a misaligned or cross-threaded seat, not under-tightening.
- Run the self-test and adjust settings. Most electric bidet seats run a brief self-rinse cycle when first powered on. Sit on the seat (the lid sensor requires weight to activate the wash function on most units) and use the remote or side panel to test the wash, rear wash, pressure, and dryer functions. Adjust water temperature and pressure to your preference. Verify the nozzle retracts fully after use. Consult your unit's manual for the initial setup sequence, as some models require a language or region selection on first boot.
Tips & warnings
- GFCI outlet is non-negotiable. Electrical code requires GFCI protection for all outlets in bathrooms, and a bidet seat combines water and electricity close together. If your bathroom has an older unprotected outlet, replace it with a GFCI outlet or install a GFCI breaker for that circuit before plugging in the bidet.
- Skirted toilets need extra attention. Toilets with a fully skirted trapway (smooth sides all the way down) often do not have accessible bolt holes from underneath. Many bidet brands sell a skirted-toilet hardware kit with side-mount bolts or an offset plate. Confirm your toilet style before ordering — forcing a standard mounting plate onto a skirted bowl can crack the china.
- Cord exits on the right. The power cord on most electric bidet seats exits from the right side of the unit when you face the toilet. If your outlet is on the left wall, measure carefully before assuming the cord will reach, or inquire with the manufacturer about cord length before purchasing.
- Old shut-off valves may not fully close — or may start weeping after being turned for the first time in years. If your valve handle is corroded or very stiff, have a plumber swap it before you start the bidet install. A leaking shut-off valve turns a 45-minute project into an emergency.
- Do not overtighten porcelain-adjacent plastic. The nuts that hold the mounting plate against the bowl, and the swivel fittings on the bidet hose, are plastic or nylon. Tighten firmly but stop when resistance builds — overtightening cracks fittings and can spider-crack the porcelain around the bolt holes.
Frequently asked questions
Do I need an electrician to install an electric bidet seat?
Only if you do not already have a GFCI-protected grounded outlet in the right location. The water and mechanical side of the install requires no licensed trade work. But adding or modifying an electrical outlet in a bathroom must be done by a licensed electrician in most jurisdictions, both for safety and code compliance.
Will a bidet seat fit my toilet?
You need to match two things: bowl shape (elongated or round) and bowl length (front of bowl to bolt holes). Most bidet seats list a maximum and minimum front-to-back bowl measurement. Also check that the tank design leaves at least 1.5 to 2 inches of clearance behind where the seat will sit. Skirted toilets and one-piece toilets sometimes need a brand-specific mounting kit.
My bathroom only has one outlet and it is on the left wall. Can I use an extension cord?
Bidet manufacturers generally recommend against standard extension cords because they introduce additional resistance and can overheat. If an extension cord is your only option in the short term, use a heavy-duty, outdoor-rated, 3-prong grounded cord rated for at least 15 amps, and make sure it is GFCI-protected at the outlet. The long-term solution is having an electrician add an outlet on the correct wall.
Does installing a bidet seat require turning off the main water supply?
No — just the toilet's individual shut-off valve, which is usually a small angle-stop valve on the wall or floor behind the toilet. You should only shut off the home's main supply if the toilet shut-off valve does not fully close or you suspect it will not hold.
The T-valve connection is dripping slightly. How do I fix it?
First turn off the supply and dry the fitting completely. Check that the connection is not cross-threaded — it should feel smooth when threading on by hand. Re-thread hand-tight, then give a firm quarter-turn with a wrench. If it still drips, remove the fitting, add two wraps of PTFE (plumber's) tape to the male threads, and reassemble. Do not keep cranking — over-torquing plastic fittings causes cracks, not seals.
How long does installation take?
Most homeowners complete the full install — shut-off through first test — in 30 to 60 minutes. Add time if you need to clean mineral deposits off the old bolt holes, if your shut-off valve is stubborn, or if you run into a skirted-toilet compatibility issue that requires a separate hardware kit.